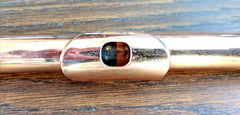
We are going to replace the traditional cork stopper in this modern wood headjoint with a new swap-stopper.
Here is a picture of the kit in its current carrying case, including stopper back, removal tool, three faces (silver, titanium, zirconium - with protective films on), weights, and cleaning cloth:

Remove old cork/stopper
First I will push out the old cork, using the tool provided. The tool has two ends, one covered end for extracting the stopper faces... ...and one open end which is used to position the stopper and insert new faces.
So, I'll use the open end to push out the old cork. Because it's open, it can slide over the screw thread. And out it comes. Luckily that didn't need much pressure. You should only remove your own cork if you know what you are doing.
Install the replacement stopper "back"
Now I'll install the replacement stopper "Back". It has two sides, one with a magnet, and one with a little hole. We want the little hole to face into the flute, toward the embouchure.
Put the stopper back, magnet facing up, on the open end of the tool. And lower the headjoint, tenon first down onto it. Push it gently but firmly past the embouchure. It should be a snug/tight fit but not require extreme force.
To find its correct position, we need to use the mark your headjoint maker placed on the cleaning rod. As we have not installed the "Face" yet, you want to push the "back" a little past where you'd normally set the stopper.
Insert the first "face"
Then, we'll choose a face. I'm going with zirconium.
You are going to place it magnet facing up (metal facing down) onto the open end of the tool - and like before, lower the headjoint over it. You will likely hear a click sound, as the face connects with the back.
Fine tune position
Now we fine tune the position. You are going to push the stopper back or forth according to the mark on your cleaning rod. Each headjoint and each manufacturer will have their preferred position. You are going to position this in the same place you would a traditional cork. It may take three of four minor adjustments till you are satisfied. But you only have to do this once. Swapping faces in the future will not require position adjustment.
First go at swapping the face
Now, to demonstrate how easy it is to change a face from now on. This time, use the tool with the covered end upward and insert into the headjoint. Push it gently till it nearly meets the stopper - and the stopper face should attach itself to the tool. Then simply pull out. Swap to another face. And again, put it magnet up, face down, onto the open end of the tool. And insert into the headjoint as before. Click. Done.
More details on positioning the stopper face
One reason I don’t supply a tuning/measuring rod with my kit is because each headjoint manufacturer has their own position. Also, a lot of marks on rods are (in my opinion) incorrect/inaccurate.

